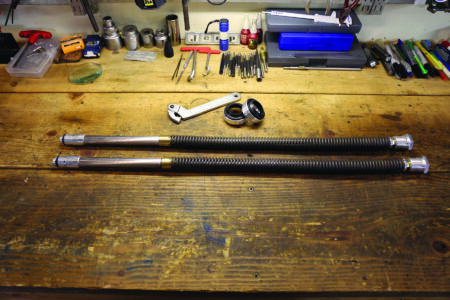
In their day, Norton’s Roadholder forks were among the very best. First introduced in 1946, they performed better than almost everything else on the market and influenced fork design for decades, but they do have their limitations.
A damping-rod design, Norton Commando Roadholder forks employ a rod-and-piston damping tube with fixed orifices to control oil flow to regulate compression and rebound. They work well enough, but the design doesn’t allow tuning oil flow for different road and rider conditions.
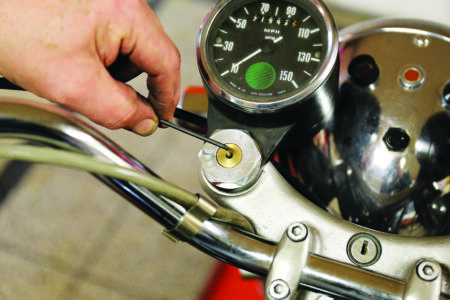
About 10 years ago, U.K. Norton specialist John Bould designed the Lansdowne dampers (named after Norton founder James Lansdowne Norton). These feature multiple, small compression and rebound orifices, and an adjustable needle valve to vary oil flow. Further, Bould’s approach employs a dedicated compression damper for one leg and a dedicated rebound damper for the other. The needle valve is attached to the top fork nut in a threaded brass insert and passes through the damper rod to the damper body. It’s adjusted using a small, 2.5mm Allen wrench, turning the brass insert in the fork nut.
Bould passed away in January 2016, and that seemed to be the end of the Lansdowne damper until Norton enthusiast and specialty parts manufacturer Donald Pender of Triton Motorcycle Parts in the Philippines secured the rights to continue their manufacture.
Our subject bike is Tech Q&A man Keith Fellenstein’s 1974 Norton Commando 850. In addition to the dampers ($360, plus shipping) we got a set of Triton’s integrated fork leg collar/dust boots ($46/pair plus shipping, includes installation tool) and a set of Leak Proof fork seals ($22/pair plus shipping). Derided by some and loved by others, we’ve used Leak Proof seals with great success on a few Japanese bikes and thought it would be interesting to try them on the Norton.
This is a relatively straightforward project and easily within reach of the average weekend warrior, but budget a full day to accommodate unexpected problems, like the broken fender-mounting stud we had to drill out of the left fork leg. Removing and disassembling the fork legs isn’t technically challenging, and the Lansdowne units go in as easily as the old ones come out. We did hit one minor snag, however. After securing the new dampers in the fork legs, the right leg went together in minutes, but the fork tube for the left leg started binding up as we pushed it to the bottom of the fork leg. Further inspection showed that the tip of the fork spring for that damper wasn’t trimmed square at the bottom end; it was snaggletoothed and catching the inside of the fork tube. To remedy this, we removed the damper assembly, removed the spring from the damper, and then hand filed the protruding edge. Upon reassembly, we put the “damaged” end of the spring at the top where it would be fixed relative to the fork tube, just in case. It then went together without issue. For fork oil, we used Lucas 10w synthetic. Note: Do not mix parts between the compression and rebound dampers; they are not interchangeable.
With the Lansdowne dampers installed and adjusted to the suggested initial compression and rebound settings, we took the Norton out for a test ride, and the improvement in performance over stock was immediately apparent. Ride quality is vastly improved, the forks no longer over-compressing on hard braking or over-extending on abrupt acceleration, and Keith’s Norton feels planted in a way it never did before. In our first miles of mixed-use urban/rural riding we softened up the compression just a bit, adjusting the compression valve out counterclockwise a further half-turn, a quarter-turn at a time. Rebound is still as first set. We think it’s a bit slow, and we’ll play with it once we’re satisfied we have the compression where we want it. Our conclusion? If you actually ride your Norton, the Lansdowne dampers are a highly recommended upgrade. You’ll never look back.
As always, we recommend having a good shop manual on hand for parts identification and proper torque specs.
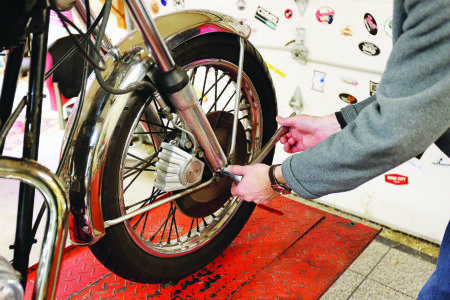
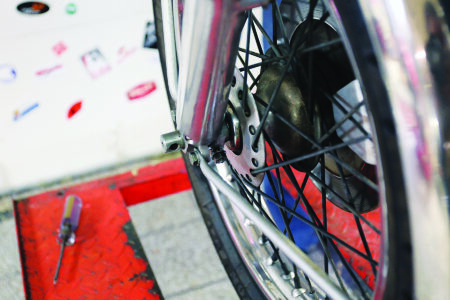
1. Support the front of the bike with the front wheel off the ground. Remove the axle nut. Loosen the axle pinch bolt at the bottom of the left fork.
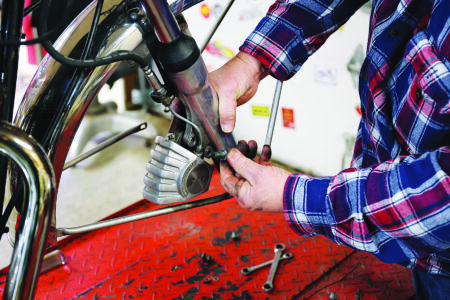
2. Draw the axle out the left side and remove the wheel, making sure to collect the left and right side wheel bearing dust washers/spacers. Remove the nuts securing the right fender stay. Remove the two bolts securing the caliper to the right fork leg.
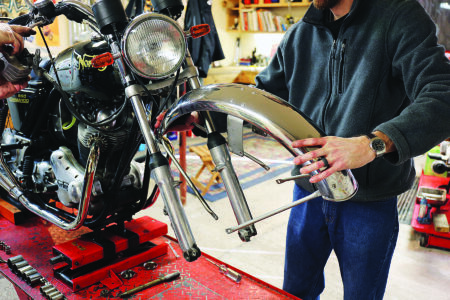
3. Remove the caliper and wire it out of the way on the frame. Remove the rest of the fender-securing nuts and bolts. Remove the fender.
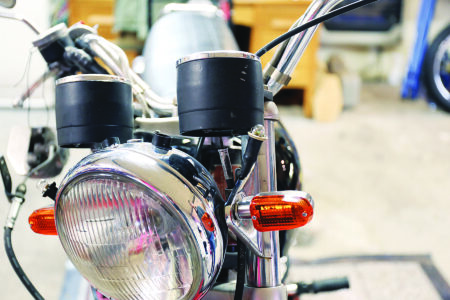
4. If so equipped, pull the instrument boots down. Remove the instrument light bulb sockets. Unscrew the speedometer and tachometer cables.
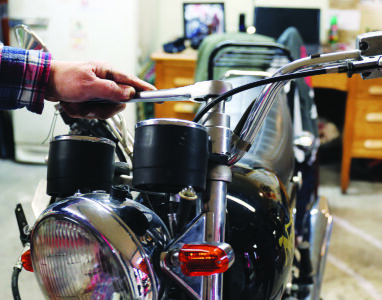
5. Using a 1-5/16-inch socket, loosen the top fork nut. Unscrew the nut completely.
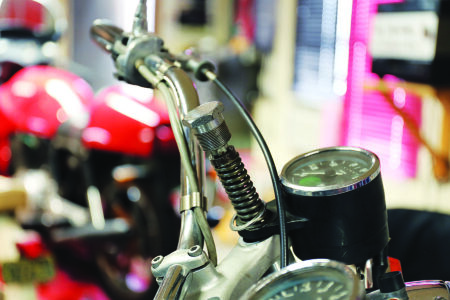
6. Push the fork leg up so the nut and the top of the damper rod and fork spring clear the instrument mount.
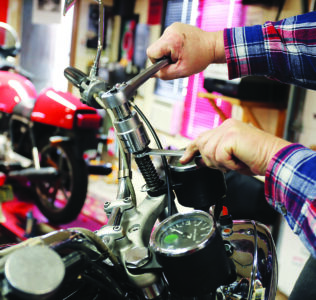
7. With a 9/16-inch open-end wrench holding the fork spring retaining nut, use the socket to remove the fork nut. Collect the large washer and remove the instrument.
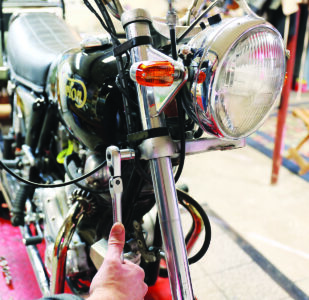
8. Loosen the fork tube pinch nut on the lower steering yoke.
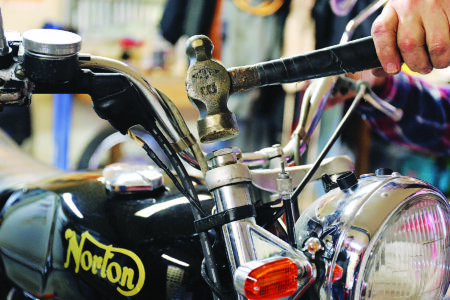
9. Thread the fork nut back into the fork tube by at least five threads. Using a brass hammer or a block of wood and hammer, rap the nut hard to break the fork tube free of the upper steering yoke. Remove the nut.
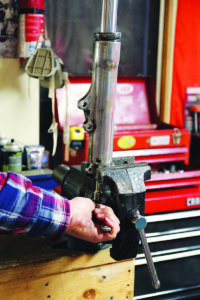
10. Pull the fork down and remove it from the steering yoke. Turn it upside down over a drain pan and drain out fork oil. Put the fork in a vise and loosen the damper rod-securing bolt at the bottom of the fork leg.
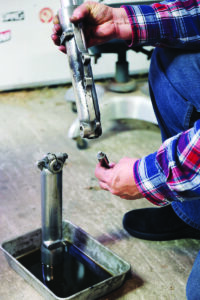
11. Hold the fork over a drain pan, remove the damper rod-securing bolt, remove the damper and spring assembly, drain out any remaining oil.
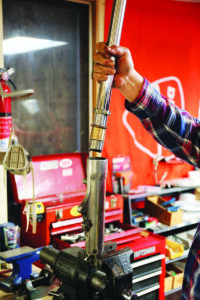
12. Put the fork back in the vise. Push the fork tube into the leg then pull up sharply so the lower fork bushing shocks the upper fork tube bushing and seal from the fork leg. It usually takes several tries. Clean the fork tube and leg.
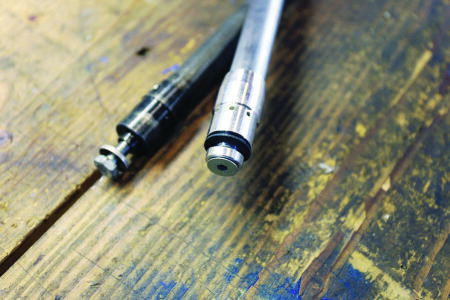
13. The Lansdowne damper uses a special securing bolt, washer and fiber gasket. Remove the bolt and washer from the supplied damper, but leave the gasket in place. The locating stub of the damper is slightly tapered. The fiber washer will hold to it and push fully in place when the damper is installed.
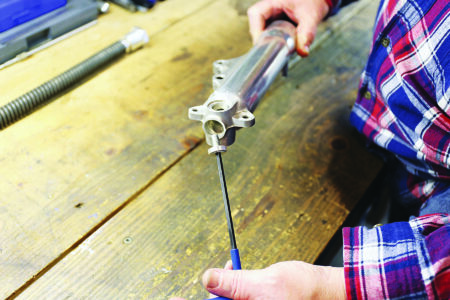
14. Insert the damper assembly with fiber washer in place into the fork leg. Ensure the damper locating stub is correctly positioned in the fork leg. Install the bolt and washer and tighten.
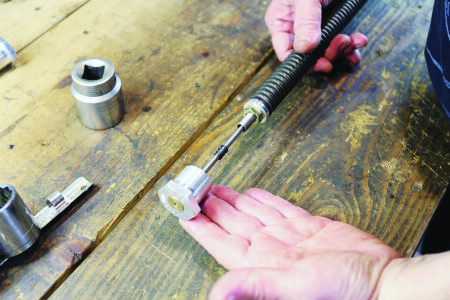
15. Remove the fork nut and needle valve from the damper assembly. It’s hand-tight as delivered. If necessary, hold the nut at the top of the damper rod with a 17mm open-end wrench and remove the fork nut. Make sure to collect the spring underneath it, visible here.
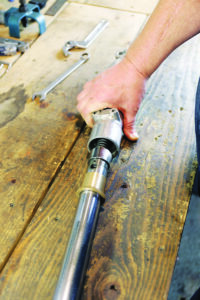
16. Slip the fork tube over the damper and spring assembly and insert the fork tube (lower bushing installed) fully into the fork leg. The bronze upper bushing is a press fit into the fork leg.
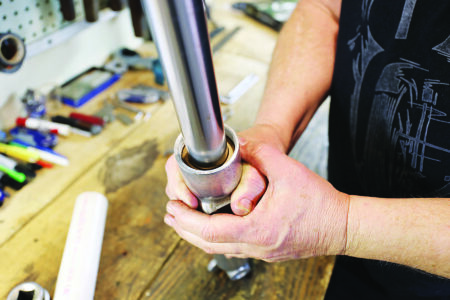
17. With the fork right side up, push the bronze bushing into the leg, then drive it fully home. We used a section of 1-1/2-inch PVC pipe, chamfered at the end to fit inside the top of the fork leg, hitting it with a hard rubber mallet to drive the bushing in.
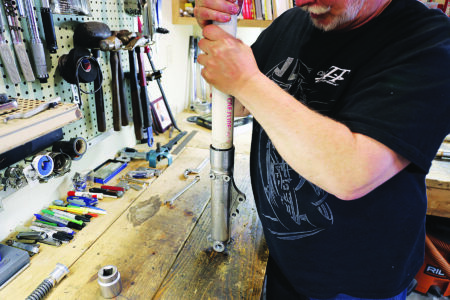
18. Using the same technique, press the fork seal fully home. If you’re using the stock seal, make sure to install the paper gasket first.
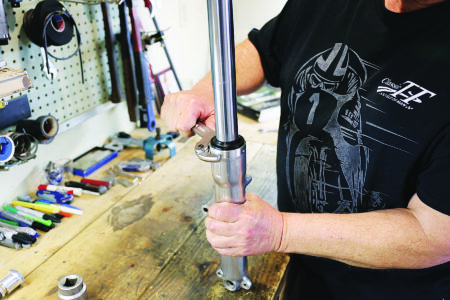
19. We opted to use Triton’s one-piece fork seal retaining nut/dust seal, which is tightened with a supplied pin wrench. For the stock retaining nut, tighten using a strap wrench and then install the dust boot.
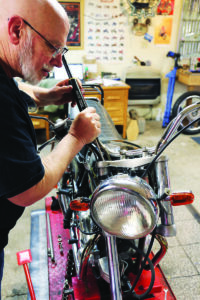
20. Install the fork leg assembly, pushing the fork tube up into the top yoke. Secure it by lightly tightening the lower pinch bolt. Slowly add 150ml of 10w fork oil. We used Lucas 10w synthetic fork oil. Let it settle.
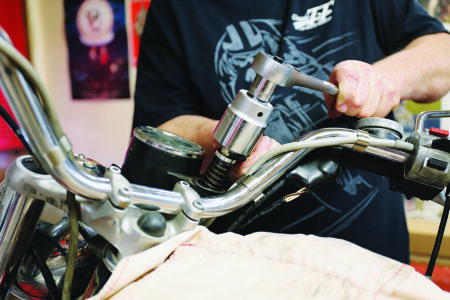
21. Lift the fork leg up to reveal the fork spring/damper rod. Place the instrument followed by the fork nut washer over the spring/damper. Insert and thread the Lansdowne fork nut/needle valve and spring into the damper rod. Tighten with a 17mm wrench on the spring nut and a 1-3/8-inch socket.
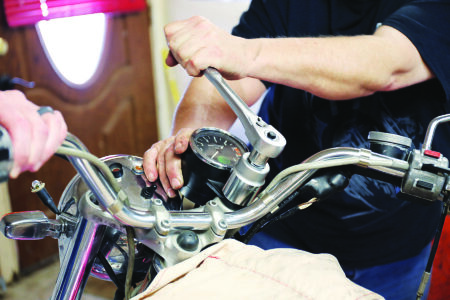
22. Thread the Lansdowne fork nut into the fork tube. Reattach the speedo/tach cable and instrument lights. Hold the instrument in the desired location and tighten the fork nut fully. Norton specified a torque of 40ft/lb.
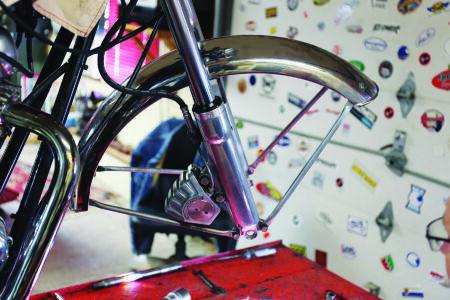
23. Loosely install the front fender. Install the brake caliper and tighten the securing bolts. Norton specified a torque of 26ft/lb.
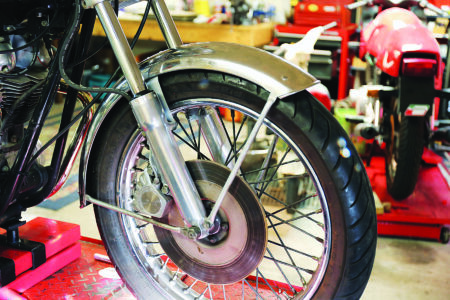
24. Install the front wheel making sure the left and right wheel bearing dust covers are in place. Install the axle and axle nut and snug up but don’t fully tighten the axle nut.
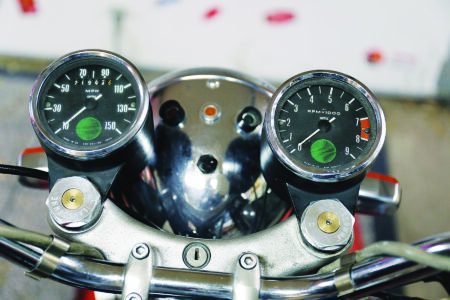
25. Here’s what you’ll see once everything is back together. We ended up with rebound on the left and compression on the right. It doesn’t matter which goes where.
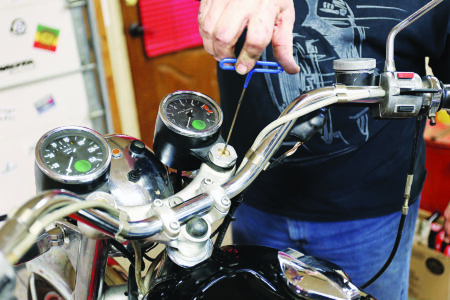
26. Using a 2.5mm Allen wrench, turn the adjusters clockwise until they just seat. You’ll feel it. Next, turn the adjusters out 3 full turns. Apply the front brake and compress the forks 10 times. This primes the dampers with oil. Next, turn the adjusters back in until they seat. Turn the compression adjuster out 1-1/4 turn. Turn the rebound adjuster out 1/4 turn. This is your starting point.
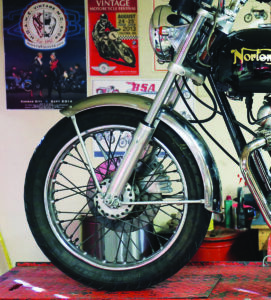
27. Finally, tighten the pinch bolts on the lower yoke, followed by the axle nut and then the pinch bolt on the bottom of the left fork. Do not overtighten this pinch bolt. Now it’s time to ride. Experiment with small adjustments to rebound and compression, no more than 1/4 turn at a time until you find your sweet spot.

